Part 1: Datasets and Assets#
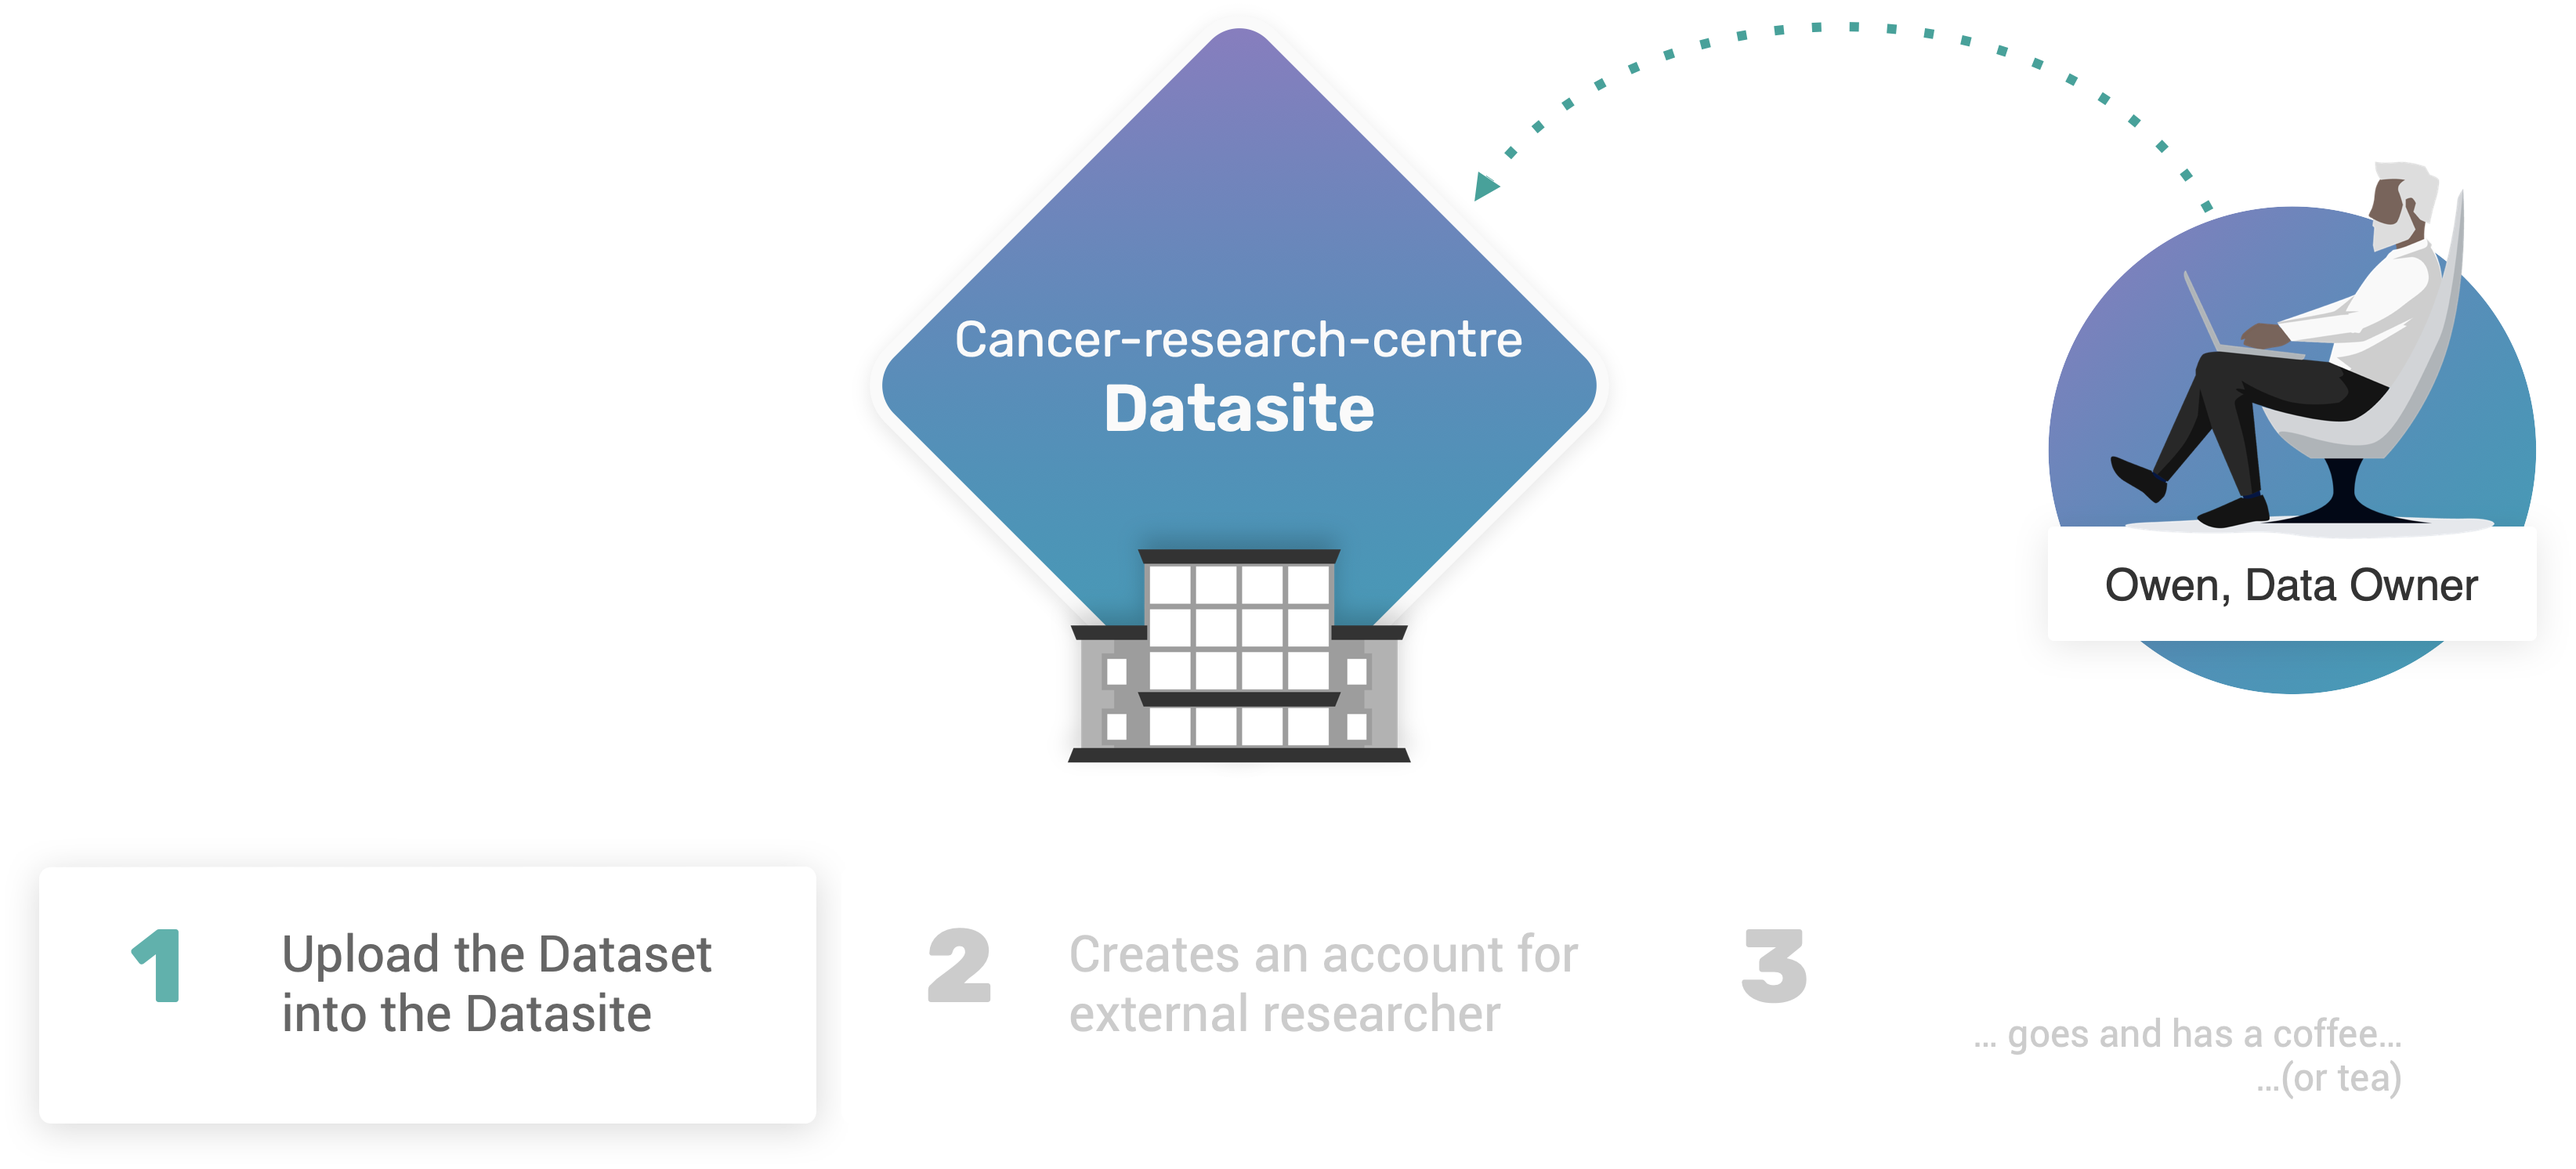
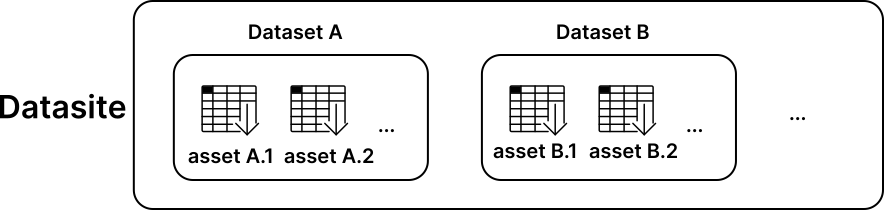
If you are new to PySyft, you need to know one word: Datasite. A Datasite is like a website, but for data instead. Web servers let you download files (e.g. .html, .css) to your browser. Datasites don’t. Instead, a Datasite helps a data scientist to download the answer to a question from data in the server, without downloading the data itself. Data in a Datasite are made available as datasets, each containing multiple assets.
In this first the tutorial, we will learn how create and upload assets and datasets to a Datasite.
What you will learn:#
By the end of part 1, you will learn:
How to quickly launch a local Datasite using PySyft;
How to create and configre assets holding public, and non-public information;
How to upload a dataset to a Datasite.
 1.1. Launch a local development Datasite#
You can launch a Datasite server in three ways:
using
syft.orchestra.launch: good for local development;using a single container (Docker, Podman): good for lightweight deployments;
using Kubernetes: good for production environments;
In this introductory tutorial, we are going to use syft.orchestra.launch. Please learn more about the Datasite and deployment options in the corresponding sections of the documentation.
Let’s first import syft as sy (we will use this coding convention throughout the tutorial, ed.):
import syft as sy
The syft.orchestra.launch functions runs a special local Datasite server, that is only intended for development purposes. Each server is identified by its unique name, which is used by PySyft to restore its internal state in case of rebooting. We will use the reset=True option to make sure that the server instance will be initialised for the first time.
data_site = sy.orchestra.launch(name="cancer-research-centre", reset=True)
Once the server is up and running, we can login into the Datasite:
client = data_site.login(email="info@openmined.org", password="changethis")
Managing user accounts
As initial first step, Owen will use the default admin credentials to login to the Datasite. In Part 2: Datasite Access, we will learn how to update and personalise these credentials, as well as how to manage user accounts.
1.2. Downloading our example dataset#
To download our example dataset, we will use the ucimlrepo Python package, that can be installed using pip:
$ pip install ucimlrepo
Use the correct Python environment
Please make sure to install this package in the same Python environment where also PySyft is installed. See the Quick Install guide for further instructions.
When it is done, let’s use the following code to download the dataset:
from ucimlrepo import fetch_ucirepo

# fetch dataset
breast_cancer_wisconsin_diagnostic = fetch_ucirepo(id=17)

# data (as pandas dataframes)
X = breast_cancer_wisconsin_diagnostic.data.features
y = breast_cancer_wisconsin_diagnostic.data.targets

# metadata
metadata = breast_cancer_wisconsin_diagnostic.metadata
# variable information
variables = breast_cancer_wisconsin_diagnostic.variables
We will use the popular Breast Cancer Dataset to simulate a version of the Owen’s “Breast Cancer Biomarker” dataset.
X.head(n=5) # n specifies how many rows we want in the preview
This dataset contains 596 samples, organised in 30 clinical features (i.e. X).
X.shape
Each sample corresponds to a single categorical target, identifying the outcome of the tumour: B as in Bening; and M as in Malign:
y.sample(n=5, random_state=10)
1.3. Create Assets and Dataset#
In the very beginning of this tutorial, I introduced PySyft by saying that it allows to work with data without downloading nor seeing any copy of the data itself. At this point though, you may be wondering:
How would it be possible for a data scientist to write their code against data they don’t have?
How would they even know where to begin? 🤔
PySyft will solve this problem by hosting two kinds of data. First, it will host the real data (more on that in a minute); second, it will host mock data, that is a fake version of the real data that data scientists can download and see.
Create Mock Data#
So, before we upload our dataset to the Datasite, Owen needs to create a mock version of their data. Let’s do that now!
import numpy as np

# fix seed for reproducibility
SEED = 12345
np.random.seed(SEED)

X_mock = X.apply(lambda s: s + np.mean(s) + np.random.uniform(size=len(s)))
y_mock = y.sample(frac=1, random_state=SEED).reset_index(drop=True)
The clinical features X_mock are obtained from the original X by adding the arithmetic mean of each corresponding column, plus some random noise from a normal distribution. The categorical targets y_mock are created by simply shuffling their original values. In this way, the data types as well as the class distribution remains unchanged, whilst any possible pattern with the samples is dropped.
Create Assets#
Now that we have both real and mock data, we are ready to create the corresponding assets in PySyft, each identified by their unique name within the Datasite.
features_asset = sy.Asset(
    name="Breast Cancer Data: Features",
    data = X,      # real data
    mock = X_mock  # mock data
)

targets_asset = sy.Asset(
    name="Breast Cancer Data: Targets",
    data = y,      # real data
    mock = y_mock  # mock data
)
Please notice how each asset holds a reference to data and mock, which are also two properties of a syft.Asset object that we can inspect:
features_asset.data.head(n=3)
features_asset.mock.head(n=3)
Create a Dataset#
Ok, so we have got two assets: features_asset, and targets_asset, and now we’re ready to upload them to the Datasite server \(\ldots\) right ?! Well, not quite! There’s a problem:
If we were to upload these assets as-is to our Datasite with no additional information, how could an external data scientist ever find and know how to use the data?
For this reason, PySyft expects each asset to be stored as part of a syft.Dataset object. Each dataset in PySyft is identified by its unique name, and contains additional metadata (e.g. description, citation, contributors) that further describe the core data it includes in its assets.
Let’s now collect our metadata, and then use it to create our Dataset object:
# Metadata
description = f'{metadata["abstract"]}\n{metadata["additional_info"]["summary"]}'

paper = metadata["intro_paper"]
citation = f'{paper["authors"]} - {paper["title"]}, {paper["year"]}'

summary = "The Breast Cancer Wisconsin dataset can be used to predict whether the cancer is benign or malignant."

# Dataset creation
breast_cancer_dataset = sy.Dataset(
    name="Breast Cancer Biomarker",
    description=description,
    summary=summary,
    citation=citation,
    url=metadata["dataset_doi"],
)
Finally, we can add the two assets to the dataset:
breast_cancer_dataset.add_asset(features_asset)

breast_cancer_dataset.add_asset(targets_asset)
Let’s finally have a look at the newly created breast_cancer_dataset object, using the default rich representation offered by PySyft:
breast_cancer_dataset
1.4. Upload the Dataset to the Datasite#
To upload a new dataset to the Datasite, we can call the upload_dataset function from the available client:
client.upload_dataset(dataset=breast_cancer_dataset)
Well done! 👏
The dataset has finally reached the Datasite 🎉.
To verify that, we could explore all the datasets accessible through our client object:
client.datasets
1.5. Shutting down the Datasite#
Once we are done with the upload of the dataset, we can shutdown the running server using the land function
data_site.land()
Congrats on completing Part 1 🎉#
Well done for completing part 1 of the tutorial! 👏
In this part, we have learnt how to set up a Datasite for our “Cancer Research Centre”. For simplicity, and with no loss of generality, we have used the local development server included in PySyft to quickly host a Datasite server on our local machine. We have then created and uploaded a new syft.Dataset to the Datasite, including assets for features and targets for the “Breast Cancer Biomarker” data.
In part 2 we will learn how to manage user credentials, and set up access to a Datasite.