Part 3: Propose the Research Study#

In part 1 and part 2 we have learnt PySyft features entirely from the perspective of the Data Owner.
Owen, as per their own duties of Laboratory Manager, and PySyft Data Owner, set up the Datasite by creating and uploading the “Breast Cancer Biomarker” dataset; and by creating Rachel’s credentials for remote access.
We will now explore how Rachel would be able to interact with a Datasite as a data scientist, and how PySyft guarantees that non-public information would never be seen nor opened by external users.
The workflow for doing remote data science with PySyft on a private dataset consists of three parts:
(1) preparing the research project: this is the most thorough part, and this will be the focus of this part; the data scientist is involved at every step here.
(2) computation on real data: the code embedded in the research project is run using the private data as input, to compute the real result (see part 4)
(3) result approval and release: the real result is inspected to ensure that it satisfies the privacy policy of the dataset; if all is fine, then the real result is sent back to the data scientist (see part 5)
The first step to carry out research on non-public data using PySyft is to prepare a research project submission.
What you will learn#
By the end of part 3, you will learn:
How to access a Datasite as a Data Scientist, and explore available datasets;
How to use mock data to prepare the data analysis code;
How to create a PySyft Remote Code Request;
How to create and submit a Project proposal to a Datasite.
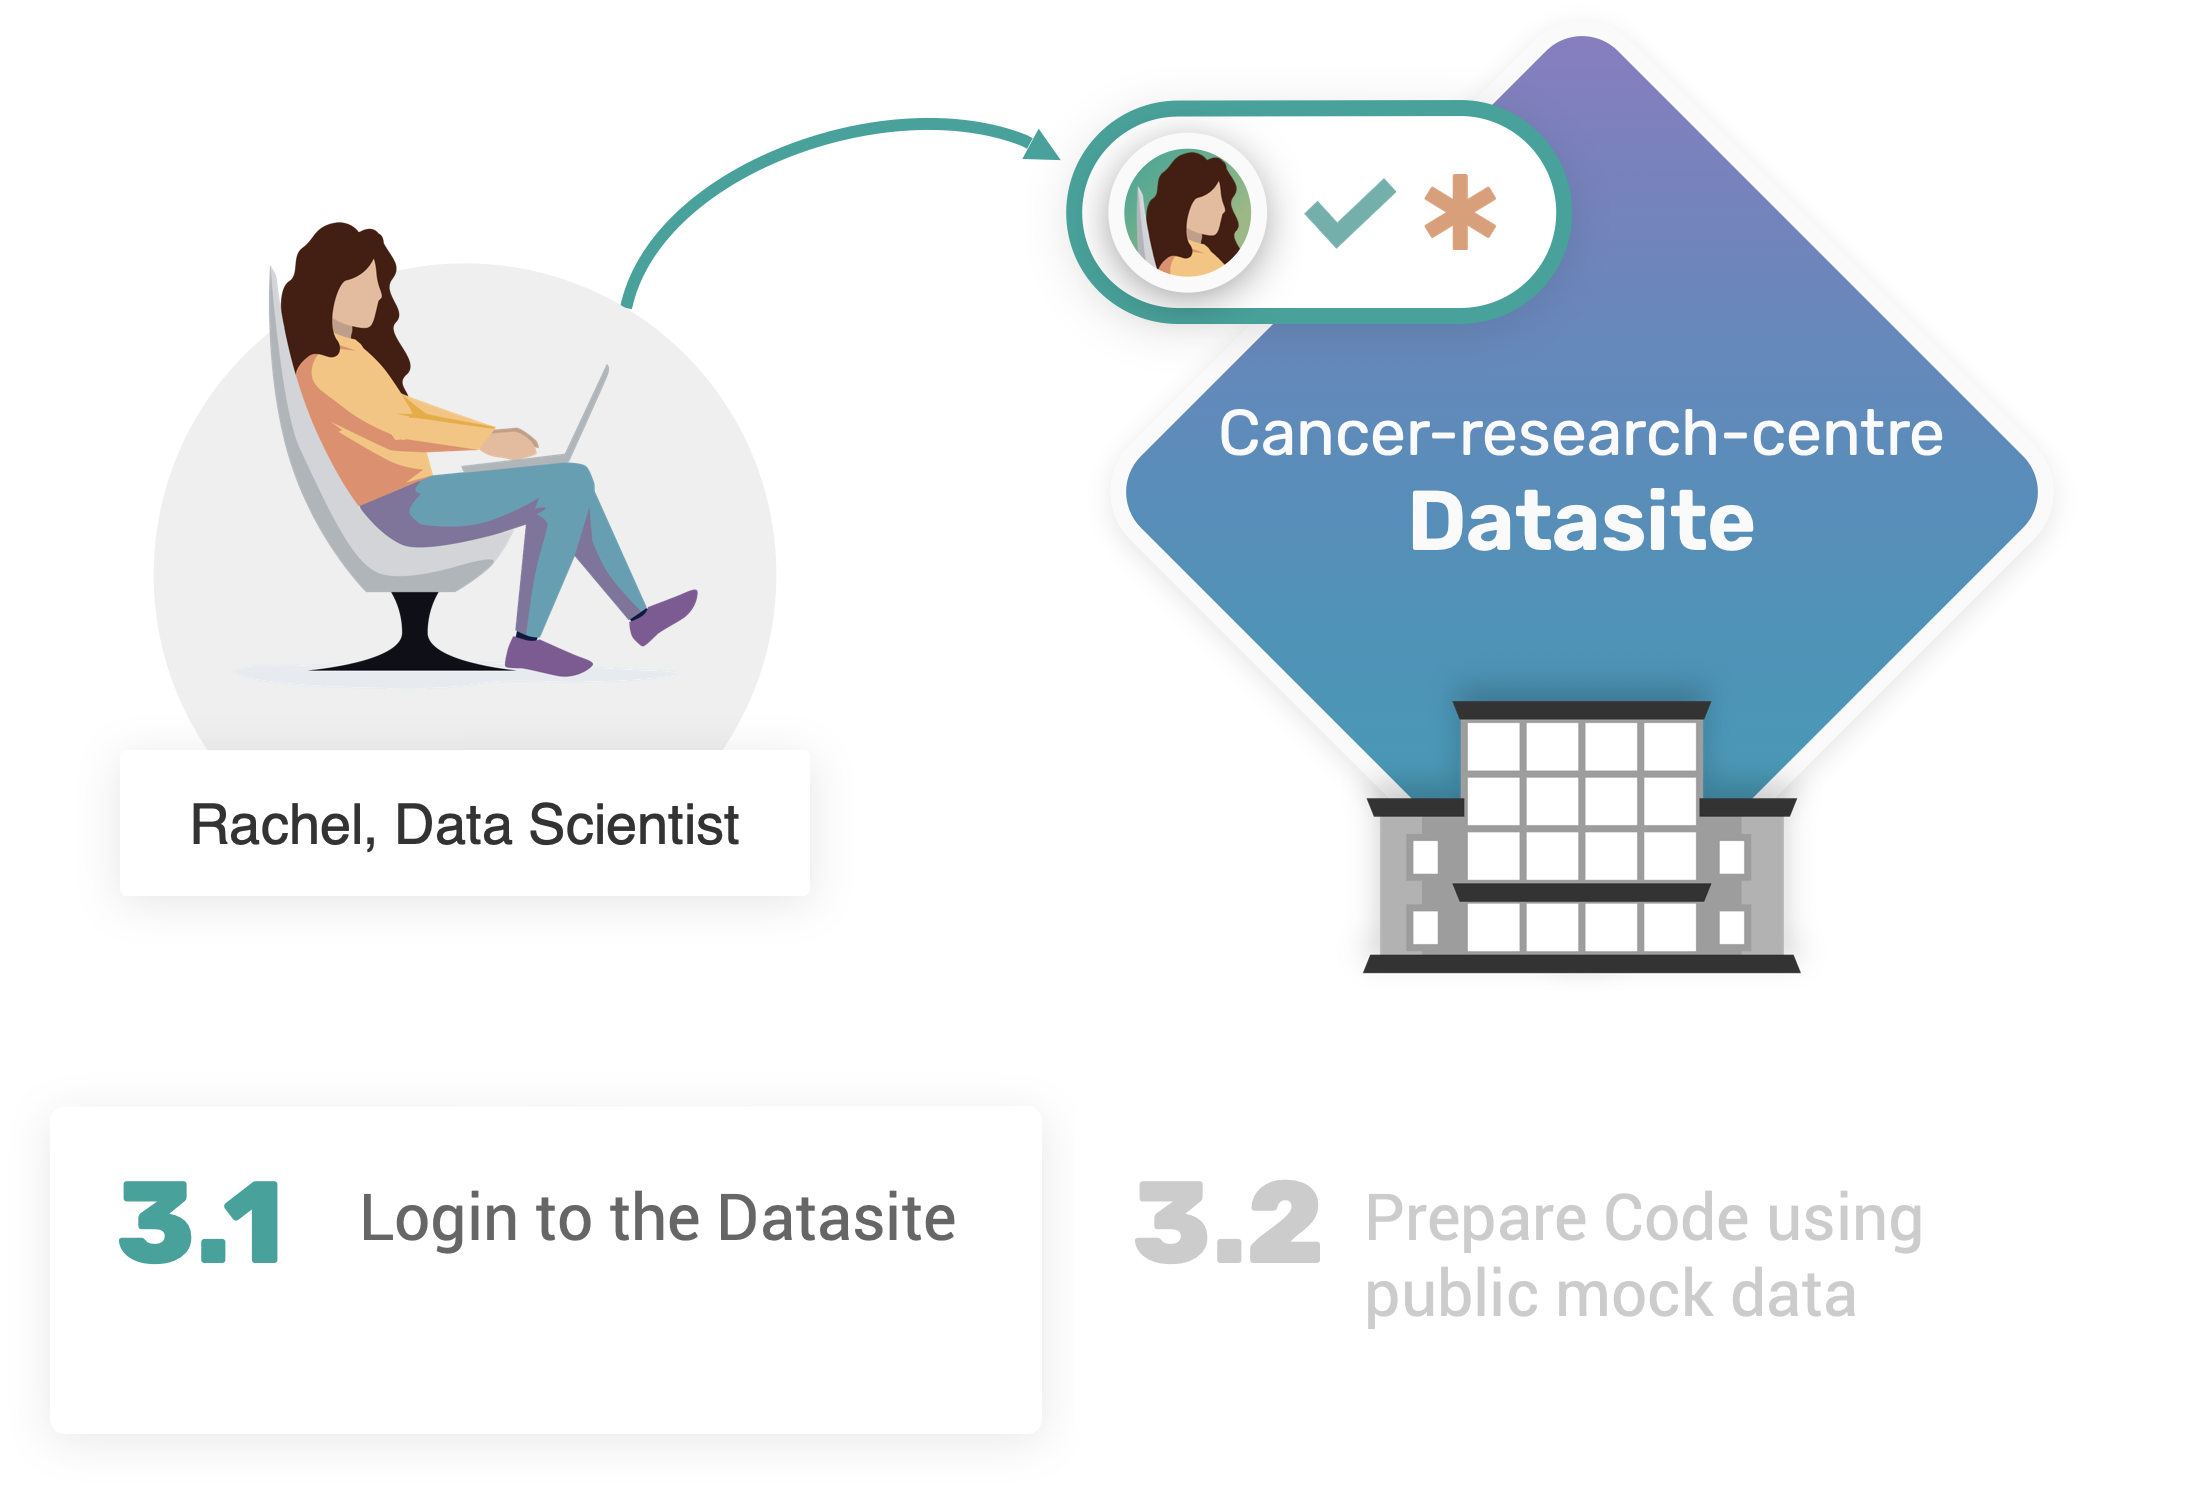
 3.1. Log into the Datasite#
First, let’s make sure that the local development Datasite is running. If not, syft.orchestra.launch will bootstrap the server instance once again.
import syft as sy

data_site = sy.orchestra.launch(name="cancer-research-centre")
Now it is time for Rachel to login to the Datasite using their newly received credentials sent by Owen separately:
client = data_site.login(email="rachel@datascience.inst", password="syftrocks")
On logging into the domain, Rachel, as data scientist, can explore the datasets available in the Datasite. We can easily do so by accessing client.datasets
client.datasets
As expected, the Datasite contains one dataset, named Breast Cancer Biomarker, which includes 2 assets.
Once identified the dataset we are interested in, we can access them either by index or by their unique name:
bc_dataset = client.datasets["Breast Cancer Biomarker"]
We obtained bc_dataset that is a pointer to a remote dataset.
bc_dataset
Using a pointer to a remote dataset, we can access its internal assets either by index or by their unique names.
In our example, we can create a pointer to the features asset, and the targets asset:
features, targets = bc_dataset.assets # using Python tuple unpacking
Let’s now validate the assumptions that only mock data is accessible to a data scientist, and that data is not. We will do so by using the two features and targets variables, that are indeed pointers to their corresponding remote assets.
Remmeber
In part 1, the two assets were created and stored as pandas.DataFrame objects.
features.mock.head(n=3) # pandas.DataFrame
Let’s try to do the same with targets:
targets.mock.head(n=3)
Brilliant! And what about data? 🧐
features.data
targets.data
As expected, Rachel, as a data scientist, does not have read permissions (nor any other permissions, ed.) on the non-public information stored in the remote asset.
This clear distinction between the main components of an asset has the following advantages:
mock data is open-access and imposes no risks to the data owner for sharing publicly non-public information;
it creates a staging environment for the data scientist to simulate their intended study in a realistic way;
reduces liability for the data scientist, who is not responsible anymore for storing safely non-public data;
enables the data owner to control how non-public assets can be used by data scientists for their study.
3.2. Prepare code using mock data#
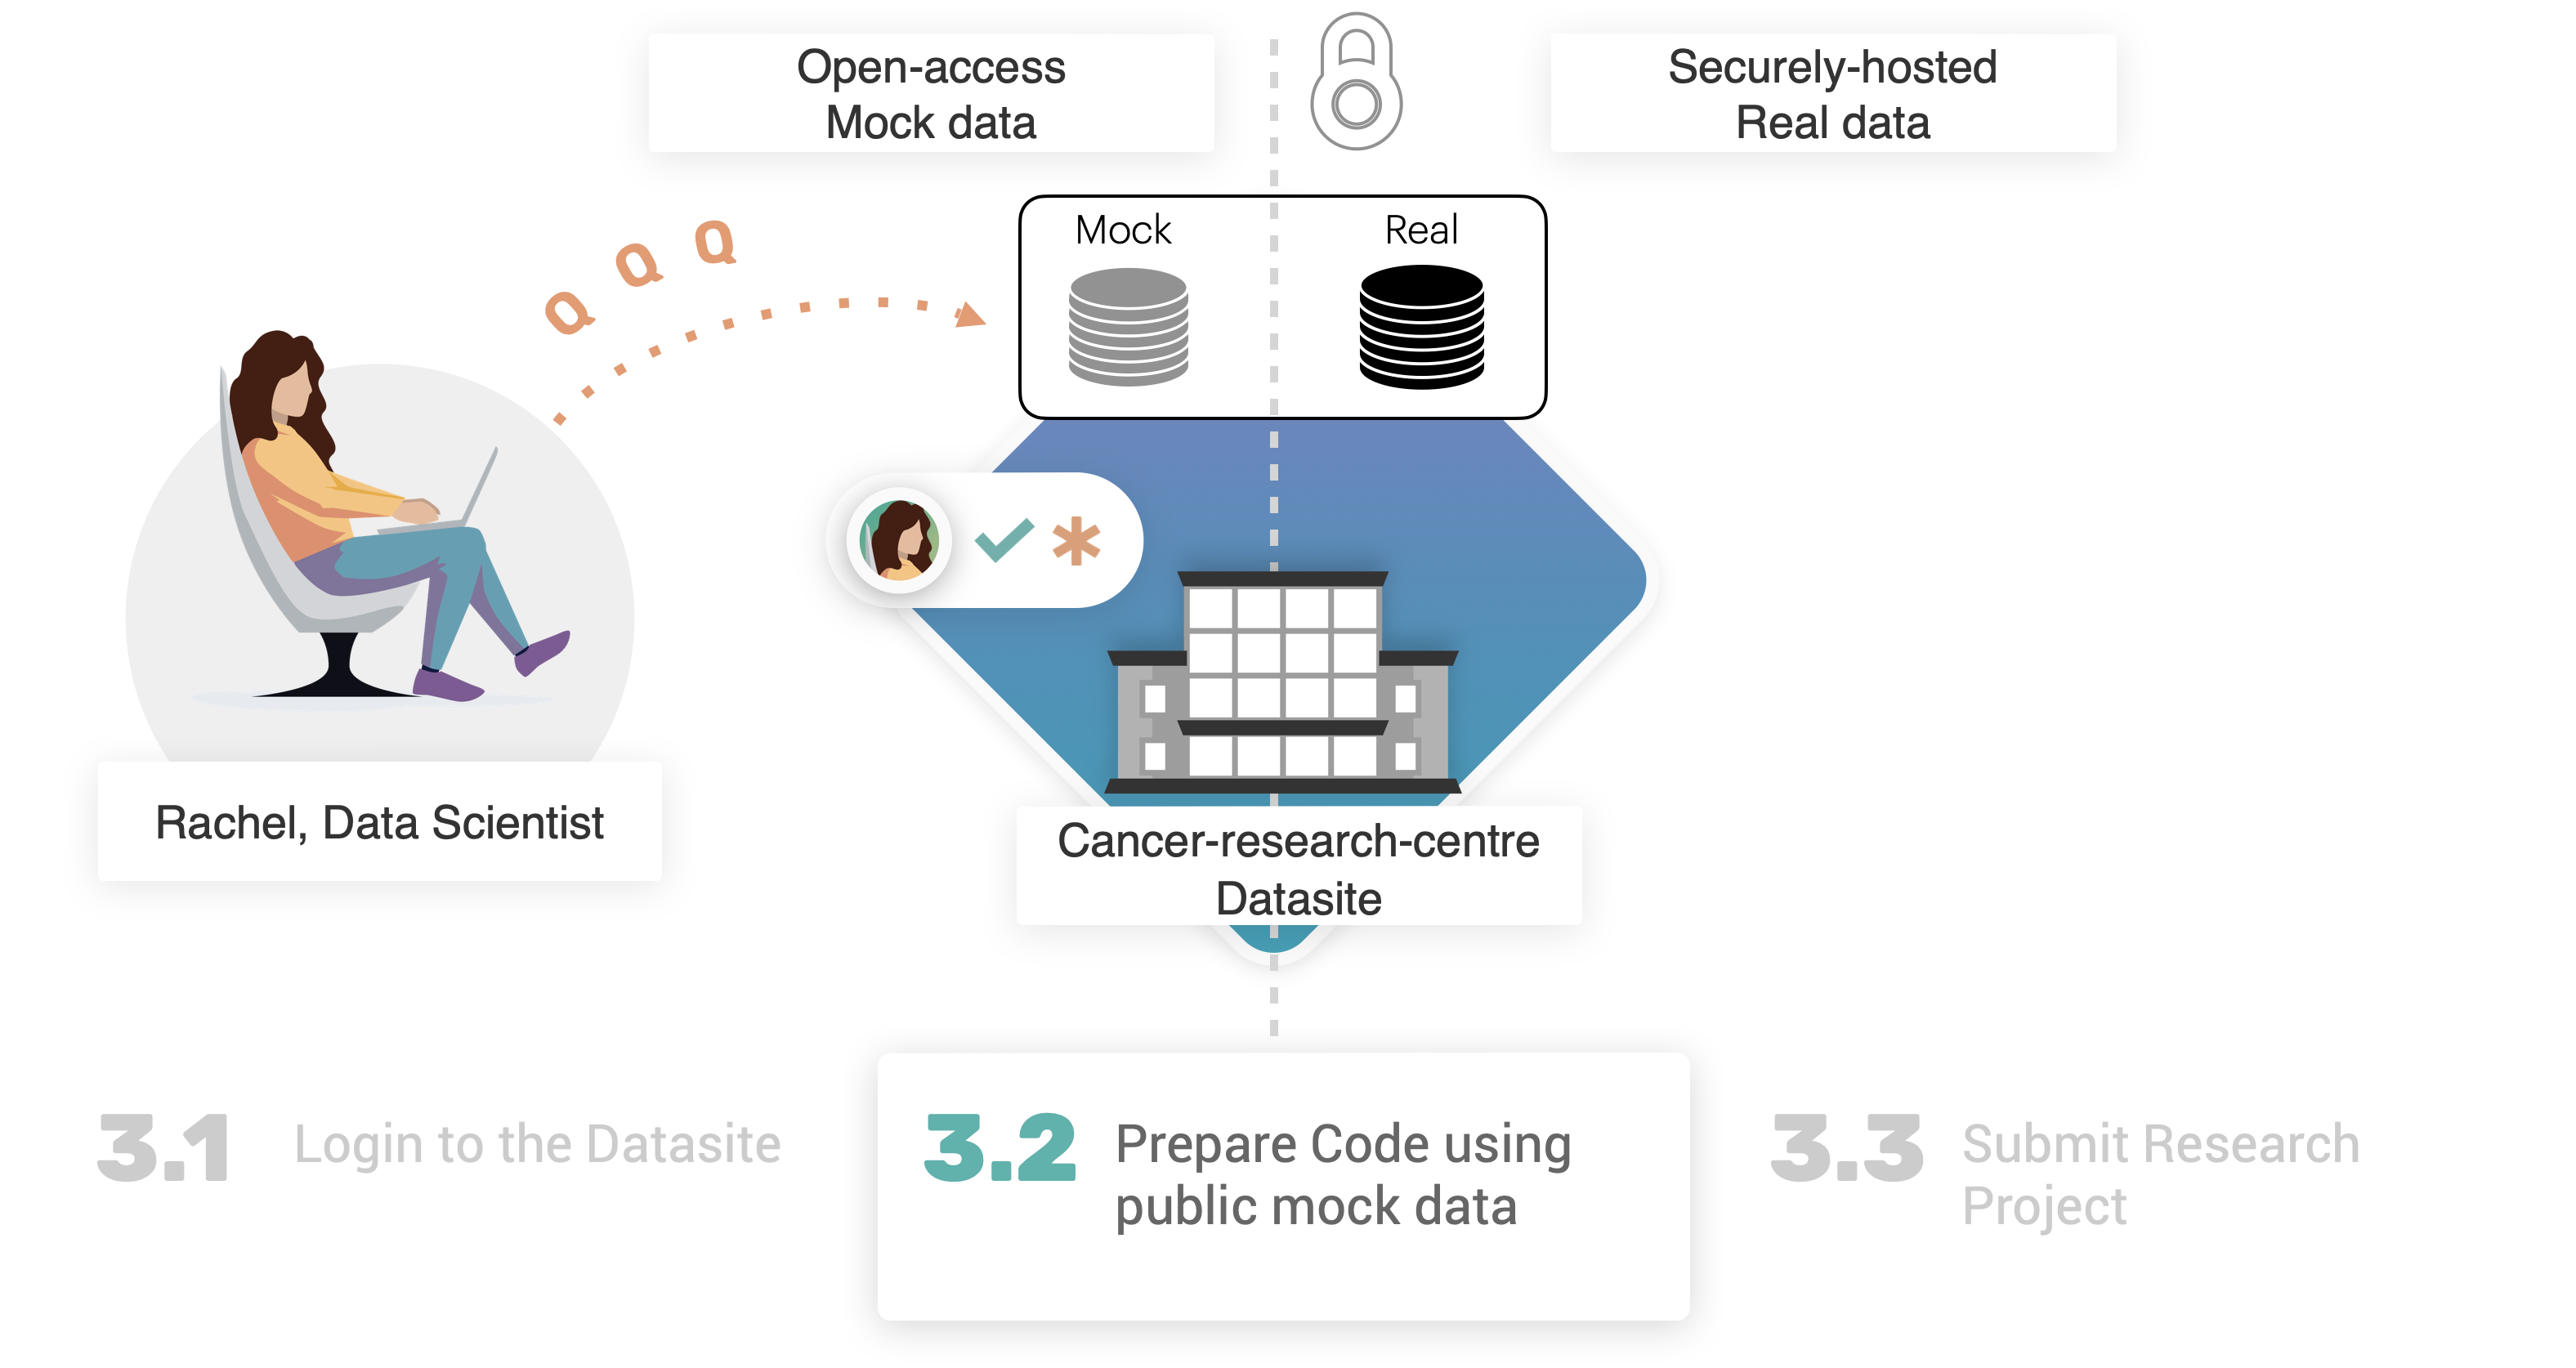
Getting access to the mock data allows to get a general understanding of what non-public data would look like. So we can use this data to start preparing our code, to run on this data.
Rachel decides to study the breast cancer data by running a simple supervised machine learning experiment using the scikit-learn library.
The dataset is represented as pandas.DataFrame, and features are already in the format expected by machine learning models: samples x features matrix.
This conclusion has been derived by looking at the mock data, and therefore we can assume it is similarly applicable to the true real data.
X, y = features.mock, targets.mock
In short, these are steps of the machine learning experiment that Rachel has in mind:
use the
train_test_splitfunction to generate training and testing partitions;apply
StandardScalerto normalise features;train a
LogisticRegressionmodel;calculate
accuracy_scoreon training, and testing data.
For simplicity, let’s wrap the whole pipeline into a single Python function. In this way it will be easier to prepare our code request to send to PySyft for execution.
def ml_experiment_on_breast_cancer_data(features_data, labels, seed: int = 12345) -> tuple[float, float]:
    # include the necessary imports in the main body of the function
    # to prepare for what PySyft would expect for submitted code.
    from sklearn.model_selection import train_test_split
    from sklearn.preprocessing import StandardScaler
    from sklearn.linear_model import LogisticRegression
    from sklearn.metrics import accuracy_score

    X, y = features_data, labels.values.ravel()
    # 1. Data Partition
    X_train, X_test, y_train, y_test = train_test_split(X, y, test_size=0.25, random_state=seed, stratify=y)
    # 2. Data normalisation
    scaler = StandardScaler()
    scaler.fit(X_train, y_train)
    X_train = scaler.transform(X_train)
    X_test = scaler.transform(X_test)
    # 3. Model training
    model = LogisticRegression().fit(X_train, y_train)
    # 4. Metrics Calculation
    acc_train = accuracy_score(y_train, model.predict(X_train))
    acc_test = accuracy_score(y_test, model.predict(X_test))

    return acc_train, acc_test
Let’s call the function on the mock data, to check that everything works:
ml_experiment_on_breast_cancer_data(features_data=features.mock, labels=targets.mock)
3.3. Submit a Research Project#
Now that our code has been tested locally, we are ready to proceed to prepare our code for remote execution, and then create a new research project to submit to the Datasite.
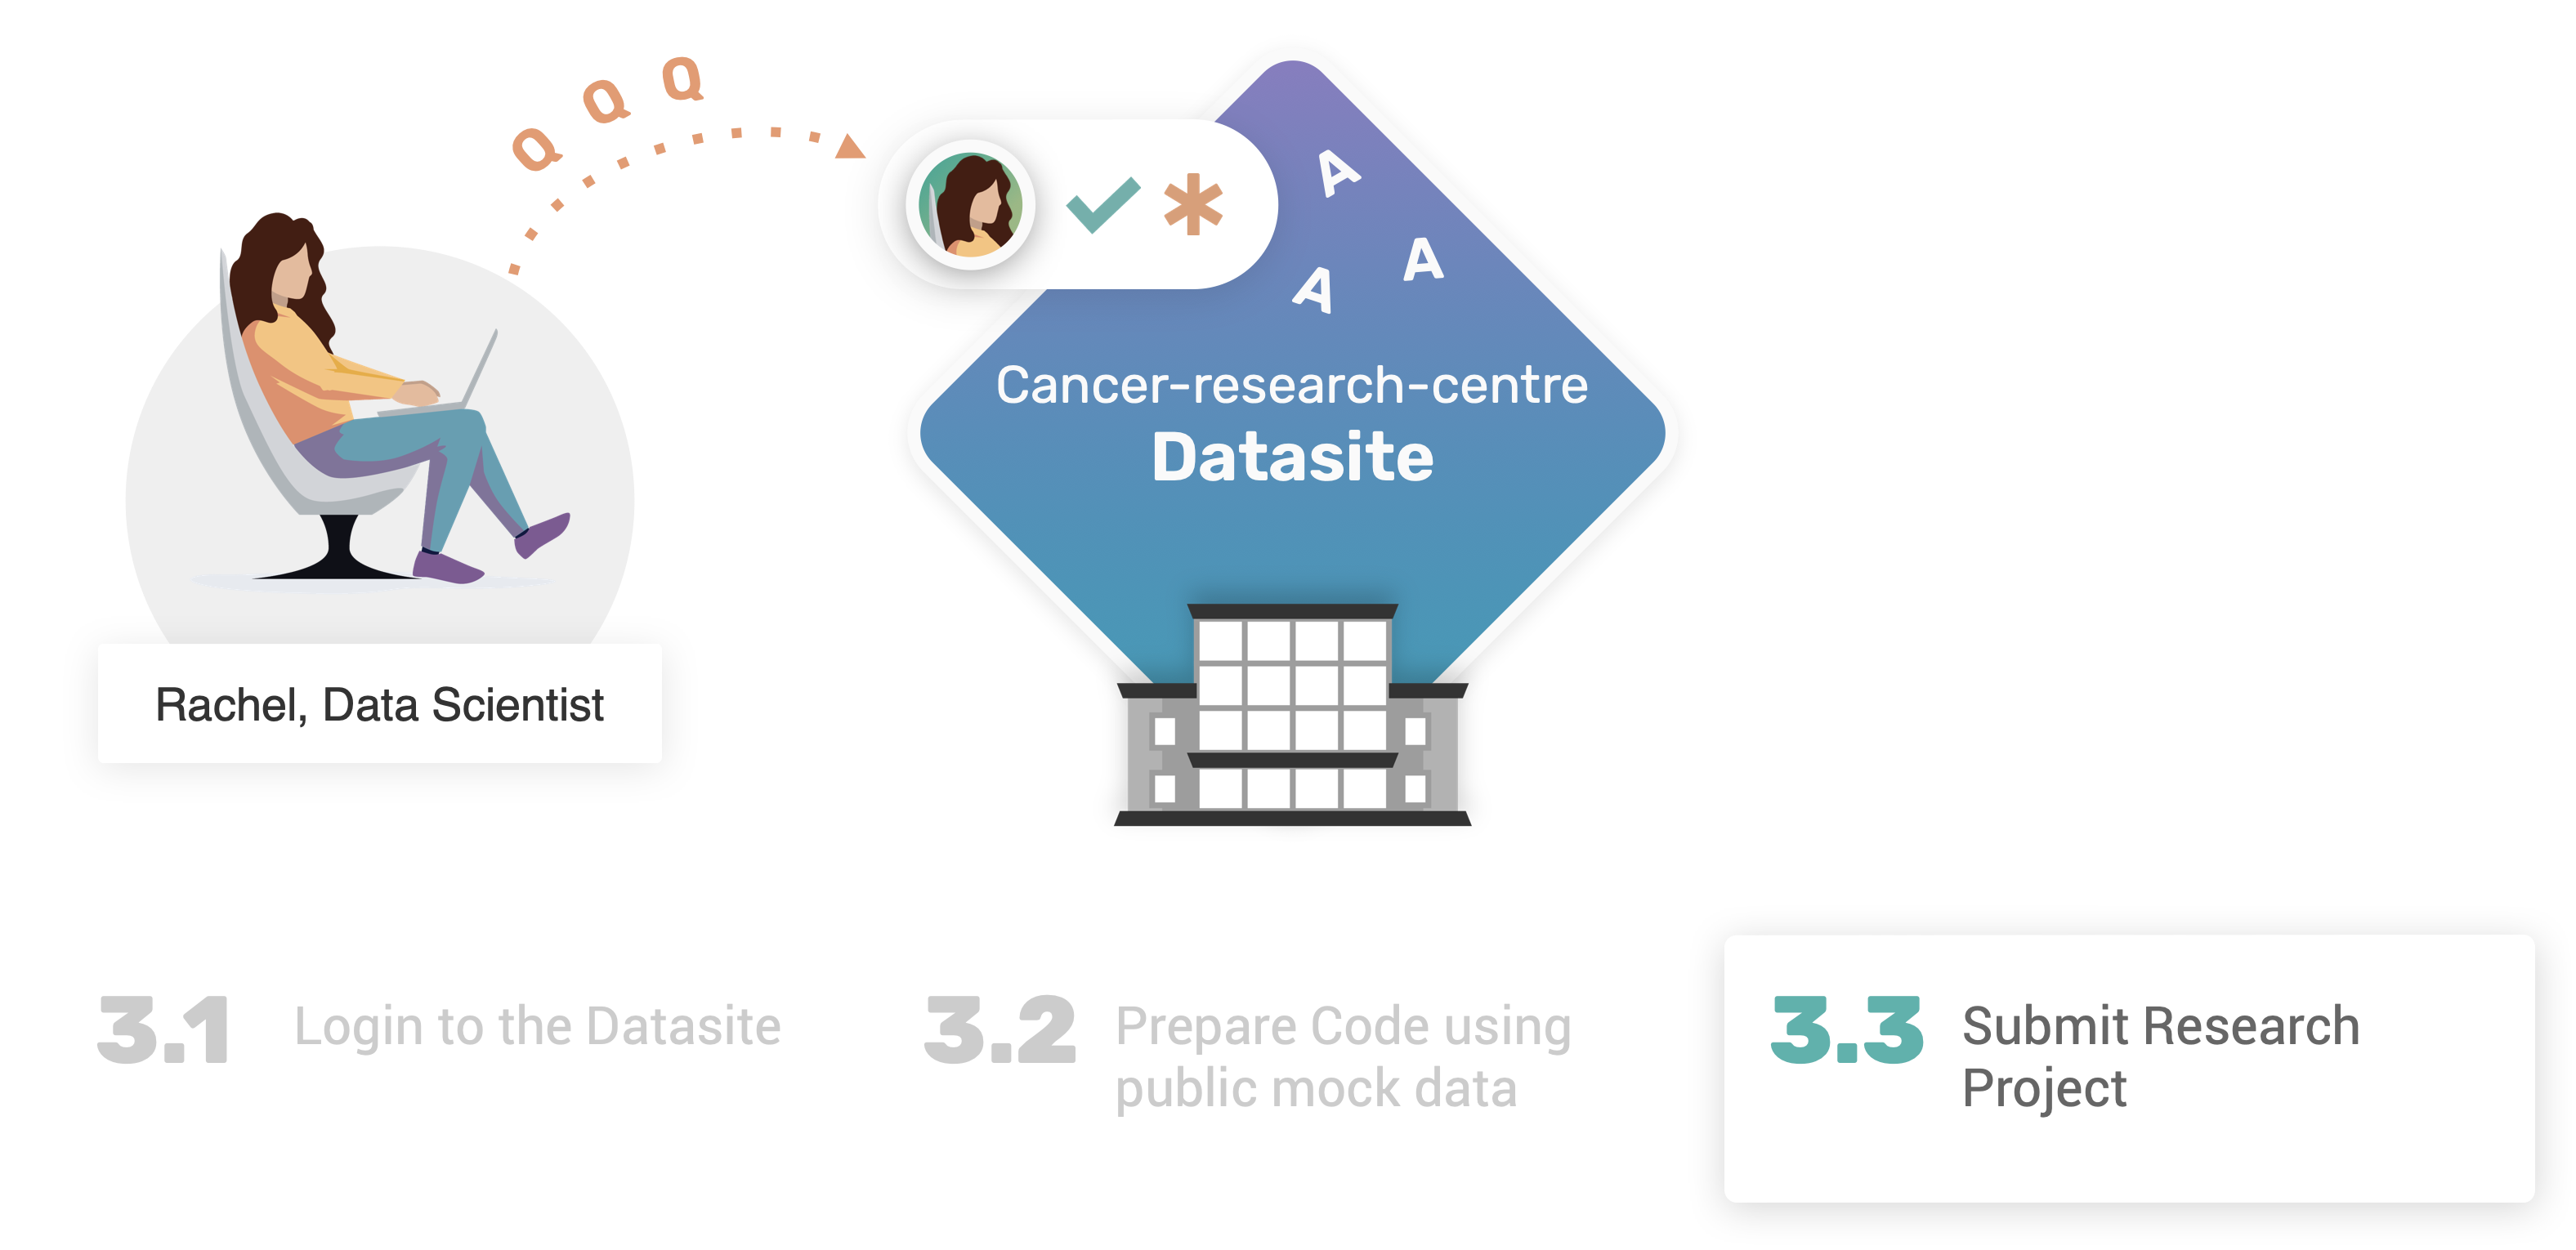
In the previous section, we have verified that our ml_experiment_on_breast_cancer_data could run with sucess locally on the mock data. Now, we would be interested in testing that function on real data, using PySyft. In prticular, we need to convert the transform our (local) Python function into a remote code request: a function that PySyft can process, and execute remotely on the Datasite, where real data are stored.
To do so, we only need to wrap our Python function with a special decorator: syft_function_single_use.
remote_user_code = sy.syft_function_single_use(features_data=features, labels=targets)(ml_experiment_on_breast_cancer_data)
syft_function_single_use decorator
The syft_function_single_use decorator is a simple shortcut over a more generic syft_function decorator. This decorator expects two main parameters, namely input_policy, and output_policy. The former provides to data owner the confidence that the submitted code will only run on the selected input assets; the latter is used to maintain status across multiple executions, e.g. imposing an upper limit to the number of times a specified code is allowed to run.
Please check out the Syft Policy Component for further details.
At this point, we may go ahead and submit our remote_user_code request. However, this would make things extremely difficult for Owen, as they would have no clue whatsoever about the intent of the code, nor of the study Rachel is willing to conduct on the “Cancer Research Centre” data!
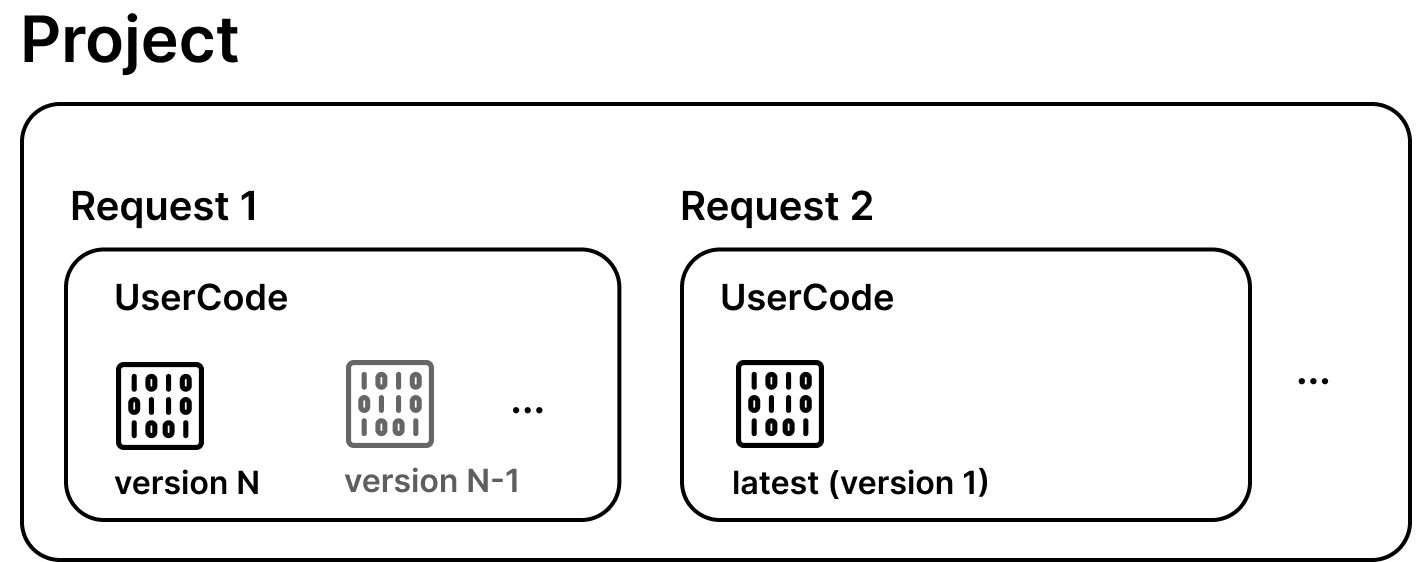
To overcome these issues, PySyft allows to create and submit a research project! In essence, a Project (i.e. syft.Project) is composed by one (or more) code request(s), and includes a (short) description to communicate the intent of the study to the data owner.
description = """
    The purpose of this study will be to run a machine learning
    experimental pipeline on breast cancer data.
    As first attempt, the pipelines includes a normalisation steps for
    features and labels using a StandardScaler and a LabelEncoder.
    The selected ML model is Logistic regression, with the intent
    to gather the accuracy scores on both training, and testing
    data partitions, randomly generated.
"""

# Create a project

research_project = client.create_project(
    name="Breast Cancer ML Project",
    description=description,
    user_email_address="rachel@datascience.inst"
)
We can access to the list of available projects through our client:
client.projects
Unique project names
Projects are identified by their unique name. This means that duplicate submissions will lead to an error in PySyft.
We can use the create_code_request method to attach our new code request to our syft.Project instance, i.e. research_project
code_request = research_project.create_code_request(remote_user_code, client)
code_request
We can now check that the code request has reached the project by accessing client.code:
client.code
We do indeed have a code request, in PENDING status. Similarly, we can review our existing requests, by accessing client.requests:
client.requests
More about user codes and requests is available in the components section.
Before moving on#
Let’s say Rachel is very impatient, and would try to force the execution of a not-yet-approved (not-yet-reviewed) request. Let’s see what PySyft allows:
client.code.ml_experiment_on_breast_cancer_data(features_data=features, labels=targets)
As expected, if we try to execute a code request that has not yet been approved, a SyftError is returned!
Congrats on completing Part 3 🎉#
Well done for completing part 3 of the tutorial! 👏
Now Rachel has prepared and finalised their research project, that has been sent to Owen for review. This project included the machine learning pipeline Rachel prepared and tested on mock data, and that has been attached to the project for remote execution on the real data.
In the part 4, we will explore how the code request revision process works in PySyft, switching again the perspective to the one of the data owner who needs to review, and in case, appove, the requests.